
7 Best Toyota Yaris Mirrors for Replacement Buyers?
Choosing a replacement Toyota Yaris Mirror is not just a matter of finding a part that looks right. Model year, trim, and market can affect the mirror’s shape, connector, and available features. A mirror with power adjustment may not replace one with manual controls. Heated glass, turn-signal lamps, and blind-spot indicators also vary by version.
Fit matters most. Before comparing options, check your vehicle’s year and trim, then compare the product details with the original mirror. Look closely at the mounting points, electrical plug, glass shape, and housing finish. If possible, confirm the part number with a Toyota dealer or a trusted parts supplier. A clear listing should explain what is included, whether the mirror arrives painted or primed, and whether it needs professional installation. Small details matter.
This guide reviews seven replacement choices for different needs, from budget-friendly assemblies to options with additional features. It aims to help buyers weigh compatibility, construction, ease of installation, and seller support without treating any one mirror as right for every Yaris. Listings can be incomplete, and photos do not always show connector differences. That can be frustrating. Read the fitment notes carefully, and contact the seller when a detail is unclear. A little checking before purchase can help prevent a mismatched part and an avoidable return.
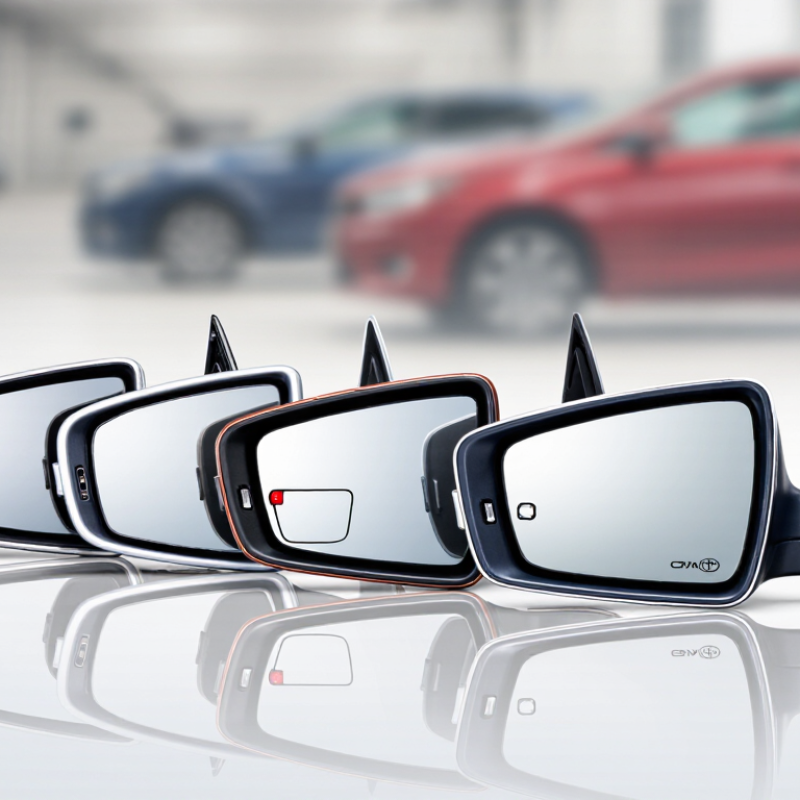
Toyota Yaris Mirror Types and Their Key Components
Replacement mirrors may be manual or power-adjustable, depending on the vehicle’s original equipment. Some versions include heating elements, turn-signal lamps, or blind-spot indicators. Check the door connector and mirror shape before ordering. A plug that looks close may still have different pins. Fit matters.
A complete assembly usually includes reflective glass, a backing plate, a housing, and a mounting base. Power models add an actuator and wiring harness; heated glass adds electrical contacts. A gasket helps seal the door opening. On a workbench, these small parts can be easy to overlook. Yet a cracked connector or bent base can spoil an otherwise sound replacement.
Visibility deserves careful attention. In its 2014 rear-visibility rulemaking, the U.S. National Highway Traffic Safety Administration estimated about 210 deaths and 15,000 injuries annually from backing crashes. That figure concerns rear visibility broadly, not side mirrors alone. Still, it underlines why clear glass and stable adjustment matter. Compare the replacement’s adjustment range, heating, and signal functions with the removed unit. One caveat: trim details can vary by year and market, so visual matching alone is not enough.
How to Confirm Mirror Fitment for Your Yaris Year and Trim
Before ordering a Yaris mirror, match the exact model year and trim—not just the body shape. A mirror that looks identical can have a different plug, mounting plate, or feature set. Check the driver or passenger side, then compare heated glass, power adjustment, folding, turn signals, and blind-spot warning equipment. Small details matter. NHTSA’s VIN-decoding guidance identifies the 10th character of a 17-character VIN as the model-year code. It does not confirm every mirror option, so use it as a starting point, not a final fitment check.
The Auto Care Association’s ACES fitment standard organizes catalog applications by vehicle details such as year, model, and submodel. Look for a listing that specifies your exact trim and mirror features. Check the door-jamb build date if a catalog notes a midyear change. Before checkout, compare connector shape and pin count, bolt spacing, and the mirror housing with your existing unit or a clear photo. Don’t rely on color alone. It can mislead. Catalog data can miss a production change, so I’d verify the connector before ordering, even when the listing looks complete.
Seven Toyota Yaris Replacement Mirrors: Features and Differences
Seven replacement mirror styles differ in control, glass, and added equipment. A basic manual mirror uses a small interior lever; it is simple, but adjustment requires reaching across the cabin. Power-adjustable versions use an electric switch for finer positioning. Heated glass helps clear a misted surface on cold mornings. Folding housings can reduce damage in tight parking spaces. Signal-integrated units add a visible lamp. Blind-spot indicator versions provide an extra warning, while wide-angle glass shows more of the next lane but can make vehicles appear smaller. Not every feature fits every model year or trim.
Fitment matters more than a long feature list. Check the model year, connector shape, mounting points, and whether the original mirror had heat or a signal lamp. The Insurance Institute for Highway Safety reported that blind-spot detection reduced lane-change crashes by 14% in its 2017 analysis of police-reported crashes. That supports extra visibility, though it does not prove every mirror indicator works equally well. A slightly mismatched connector can turn an otherwise good replacement into a frustrating job.
Tips: Compare the old mirror’s plug and bolt pattern before ordering. Confirm glass curvature and side-specific fit. After installation, adjust the mirror while seated, then check the view beside a parked vehicle. Small gaps in coverage matter. Recheck after a short drive.
How to Compare Mirror Glass, Adjustments, and Installation Options
Choosing replacement mirror glass begins with matching the vehicle’s model year, trim, and existing mirror shape. Compare the glass outline and mounting points, not just the listed dimensions. A slight mismatch can leave a visible gap or prevent the glass from sitting securely. Small detail, big difference. Check whether the mirror is flat or convex, and confirm any heating or other built-in functions before ordering. I would not assume that similar-looking glass is interchangeable.
Adjustment options affect daily use. Manual mirrors are simpler, while powered adjustments need compatible connectors and controls. Some versions also include heated glass or integrated indicators. Compare the functions on your existing mirror with the replacement listing, and inspect connector photos when available. If a feature is unclear, ask the seller to verify it against the vehicle details.
Installation depends on what is being replaced. Glass-only kits may attach to a backing plate with clips or specified adhesive; follow the supplied instructions and avoid pressing hard on the glass. A complete assembly can involve wiring and access behind the interior door trim. Fit matters most. If wiring, broken mounts, or unfamiliar fasteners are involved, a repair professional can help prevent damage. Allow extra time; clips can be stubborn, and rushing rarely improves the fit.
7 Toyota Yaris Mirror Replacement Options: Compare Features and Installation Scope
The bars count the features named in each example configuration; they are not product ratings or a guarantee of Toyota Yaris fitment. Options range from replacement glass to a feature-rich complete assembly. Check your vehicle’s year and trim, connector, mounting points, glass shape, and existing adjustment and heating features before ordering. Installation requirements vary by vehicle and part.
What to Check Before Buying and Installing a Replacement Mirror
A replacement mirror must match more than the vehicle’s general shape. Check the model year, body style, and whether you need the left or right side. Small differences can change the mounting points or electrical connector. Compare the old mirror’s plug and base with clear photos of the replacement before ordering.
Check which features your current mirror has. It may include power adjustment, heating, a turn signal, or a blind-spot indicator. A mirror that looks right can still lack one of these functions. Confirm the glass shape and housing finish, too. Easy to miss.
Before installation, inspect the door area for cracked clips or bent mounting studs. Use the vehicle’s service instructions, especially if wiring is involved. Disconnecting the battery may be appropriate for electrical work, but check the guidance for your vehicle first. Never force a connector or plastic trim; a stubborn clip can break.
After fitting the mirror, test every adjustment and feature while parked. Then check the view from your normal driving position. Take your time here. I’d recheck the angle after a short drive, since a mirror can seem aligned in the driveway and feel different on the road.
7 Best Toyota Yaris Mirrors for Replacement Buyers? - What to Check Before Buying and Installing a Replacement Mirror
| Replacement Mirror Type | Best Suited For | What to Check Before Buying | Installation Considerations | Key Trade-Off |
|---|---|---|---|---|
| Manual-adjust replacement | Vehicles originally equipped with a manually adjusted mirror, or buyers seeking a simpler replacement. | Confirm model year, body style, left or right side, mounting points, and whether the mirror is manual-adjust. | Compare the mounting base and fastener locations with the original part. Protect the door finish while removing the interior trim. | Usually has fewer electrical connections, but cannot be adjusted from inside the vehicle. |
| Power-adjust replacement | Vehicles with an electrically adjustable mirror and a matching door wiring harness. | Check connector shape, pin count, adjustment functions, side, and vehicle-specific fitment information. | Disconnect the battery when required by the service instructions. Route and reconnect the wiring without pinching it behind the trim. | Offers in-cabin adjustment, but connector or wiring mismatches can prevent operation. |
| Heated replacement | Vehicles originally equipped with mirror heating and the necessary wiring and controls. | Verify that the original mirror has a heating function and that the replacement includes compatible heater connections. | Connect heater leads only according to the vehicle’s wiring information; do not assume an unused connector provides power. | Can help clear moisture or light frost, but may not work if the vehicle lacks the required circuit or control. |
| Mirror with integrated turn signal | Vehicles whose original side mirror includes a turn-signal lamp. | Check lamp location, connector, lighting function, side, and whether the vehicle’s wiring supports the feature. | Test the signal and other mirror functions before reinstalling the door trim. | Adds a visible signal feature, but an incompatible lamp or connector may require additional parts or wiring. |
| Mirror with blind-spot indicator | Only vehicles designed with a compatible blind-spot monitoring system and mirror indicator. | Confirm the vehicle’s original equipment and system configuration. A mirror alone does not add blind-spot detection. | Follow vehicle-specific procedures and check system operation after installation; calibration or diagnostics may be needed. | Preserves an existing indicator when correctly matched, but is not a substitute for the vehicle’s sensors and system. |
| Complete mirror assembly | Buyers replacing a damaged housing, glass, mounting base, or several parts together. | Compare the complete assembly’s mounting pattern, connector, functions, finish, and side with the original. | Typically requires access behind the door trim. Support the assembly while removing its fasteners to avoid dropping it. | Replaces multiple components at once, but may cost more than replacing glass or a cover alone. |
| Replacement glass or glass-and-plate unit | Cases where the housing and mounting base are intact and only the mirror glass is damaged. | Check glass shape, backing-plate attachment, side, curvature, and whether heating or other features are present. | Wear eye protection and handle broken glass carefully. Use the specified attachment method and avoid forcing the glass onto its mount. | Can avoid replacing the entire assembly, but will not repair a cracked housing, loose base, or failed adjustment mechanism. |
Fitment reminder: Mirror equipment can vary by model year, body style, market, and trim. Match the vehicle’s original functions and compare the mounting points and electrical connector before ordering. After installation, test adjustment, heating, lighting, and indicators only where equipped.
English
Français 