
How to Choose the Right Irrigation Parts?

    Choosing the right Irrigation Parts can determine whether water reaches plant roots evenly or pools beside a walkway. A system may include filters, valves, pressure regulators, pipes, emitters, and connectors. Each component must match the water source, operating pressure, soil, and planting layout. Small choices matter. A narrow filter can clog; an oversized emitter can waste water. Fit comes first.

    The stakes extend beyond a single garden. FAO AQUASTAT data indicate that agriculture accounts for roughly 70% of global freshwater withdrawals. That figure describes a worldwide pattern, not the needs of every property, but it underscores why efficient irrigation design matters. When selecting parts, check manufacturer flow and pressure specifications, confirm pipe dimensions, and consider water quality. These details are easy to overlook when replacing one worn fitting. They can also prevent leaks, uneven coverage, and repeated repairs.

    This guide explains how to compare common Irrigation Parts and choose components for a practical, dependable setup. It will consider drip and sprinkler applications, material durability, filtration, compatibility, and maintenance access. No single parts list suits every site. A sandy bed, a sloped lawn, and a greenhouse may need different solutions. Even careful planning can miss a detail; checking the system under operating pressure is a useful reality check before treating the job as finished.
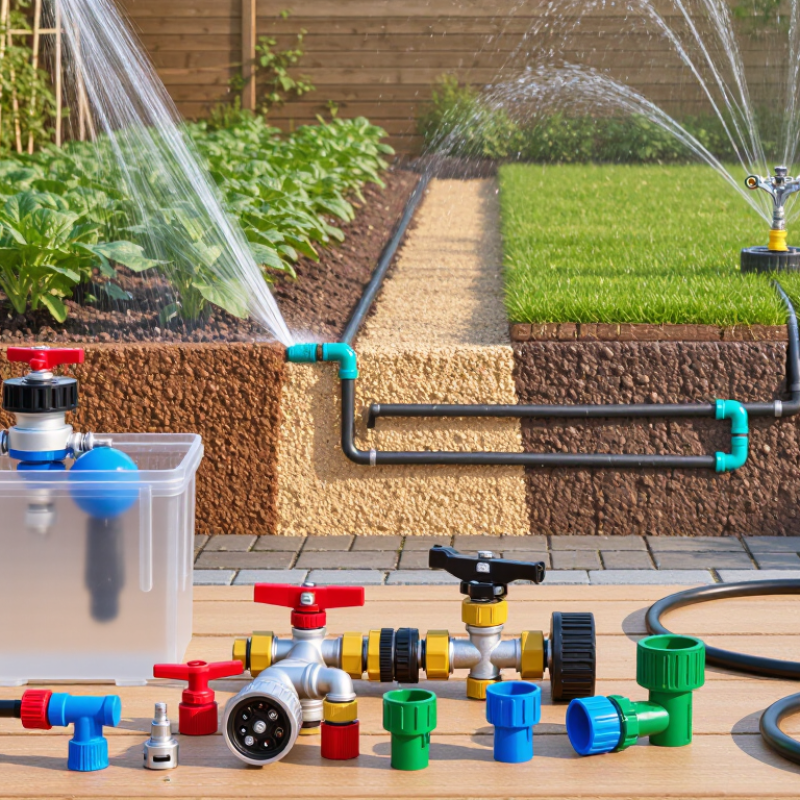
    How to Choose the Right Irrigation Parts?

    Assess Your Irrigation System’s Water Source and Coverage Needs

    Choosing irrigation parts starts with the water source, not the catalog. A municipal connection may provide steady pressure, while a well or storage tank can fluctuate as pumps cycle. Measure pressure and flow while water is running; static pressure alone can mislead. EPA’s WaterSense program estimates that landscape irrigation accounts for nearly one-third of U.S. residential water use, or about 9 billion gallons daily. That scale makes matching parts to actual demand worthwhile.

    Next, map the coverage area. Note each bed’s length, slope, sun exposure, and plant type. A narrow strip beside a path may need different emitters from a broad lawn, and mixed zones can leave some roots dry while others sit in soggy soil. The USGS report Estimated Use of Water in the United States in 2015 estimated irrigation withdrawals at 118 billion gallons per day, about 42% of freshwater withdrawals. Those figures describe national use, not a target for one garden. Still, they make waste hard to ignore. Check flow rates against your source, and choose filters suited to the water’s sediment. I still find this easy to overlook: even well-chosen parts cannot fix a poorly measured layout. A pressure gauge helps, but it cannot show whether water reaches every root zone.

    Identify the Main Components and Their Functions

    An irrigation system works as a chain: each part controls where water goes, how much flows, and when it arrives. The controller sets watering times, while electric valves open and close separate zones. Match the controller’s zone capacity to your layout. A small garden may need only a few zones.

    Pipes or flexible tubing carry water from the supply to each planting area. Filters catch grit before it blocks narrow passages, and pressure regulators keep flow within the range that emitters or sprinklers can handle. Drip emitters release water near roots; spray heads cover wider areas. Fittings connect sections, and shutoff valves make repairs easier. Small parts matter. A clogged filter can leave plants dry even when the controller runs on schedule.

    Check the water source and system pressure before choosing parts. Measure tubing diameter, note the number of planting zones, and consider whether plants need steady drip or broader spray. Too much pressure may cause leaks or uneven coverage; too little can leave distant heads weak. Test one zone and watch the soil, not just the spray pattern. It is tempting to assume every fitting will fit, but measurements can be slightly off. A simple pressure gauge and a bucket test can reveal problems before installation.

    Match Part Types and Sizes to Your System’s Requirements

    How to Choose the Right Irrigation Parts?

    Match Part Types and Sizes to Your System’s Requirements

    Choose irrigation parts by measured demand, not by pipe appearance. List each zone’s emitters or sprinklers, required flow, and operating pressure. Measure the water source while it is running. Then compare its flow with the combined demand of equipment operating at once. Long pipe runs, elbows, and elevation changes can reduce pressure. A larger pipe alone may not fix that. Select filters, valves, and regulators for the expected flow range. Small details matter. FAO reports that agriculture accounts for about 70% of global freshwater withdrawals, making efficient delivery an important consideration (FAO AQUASTAT).

    Tips: Use a pressure gauge at the connection, and check flow with a timed-volume test. Match filter mesh to emitter requirements; confirm valves and pipes can handle the zone’s demand. The U.S. EPA reports that weather-based irrigation controllers can reduce irrigation water use by up to 30% compared with conventional controllers. Good sizing supports even delivery, though actual savings depend on system design and use. I still recheck field readings; they can be messy.

    Check Compatibility, Durability, and Local Conditions

    Choosing irrigation parts starts with compatibility, not price. Check pipe diameter, thread type, pressure rating, and flow rate before ordering. A fitting that looks close may still leak or restrict water. Measure twice. For drip lines, compare emitter spacing and operating pressure with the filter and regulator. For sprinklers, match nozzle flow to the available supply; otherwise, coverage may become patchy. Keep an old connector or clear photos nearby when shopping. Product labels can be confusing, so verify measurements rather than relying on appearance.

    Durability depends on exposure and water quality. Parts in direct sun need materials suited to UV exposure, while systems in freezing areas may need easy-to-drain fittings. Small leaks matter. Local soil and terrain also affect the choice: sandy ground drains quickly, while clay can hold water near roots. Sloped beds may need pressure-compensating emitters to reduce uneven watering. Hard water can leave mineral buildup, so choose parts that are easy to inspect and clean. A practical setup may still need adjustment after a few watering cycles. Check for damp spots, clogged outlets, and weak spray patterns, then compare the results with the part specifications.

    How to Choose the Right Irrigation Parts?

    Check compatibility, durability, and local conditions before choosing a drip emitter.

    Drip emitters are commonly available at nominal flow rates such as 1, 2, and 4 L/h. The right rate depends on crop water needs, soil infiltration, and run time. Confirm that the emitter matches your tubing, operating pressure, and filtration; choose materials rated for your sun exposure and water conditions.

    Plan for Installation, Maintenance, and Future Replacement

    Plan irrigation parts around the system you will actually install, not just the parts list. Before ordering, check pipe diameter, connection type, water pressure, and required flow. A threaded fitting may look right but still have the wrong thread. Measure twice.

    Allow room to reach valves, filters, and connectors after installation. Keep valve boxes clear of soil and leave enough slack in tubing for small repairs. I’ve found that accessible connections save time during seasonal checks. The layout may change once you dig, so mark pipe routes before covering them.

    Maintenance affects which parts make sense. Flush filters and lines as recommended for your system, and inspect emitters for uneven flow or clogging. Look for damp patches, cracked fittings, and loose connections after watering. Keep it simple. Record part sizes and model details in a notebook; memory fades faster than expected.

    Think about replacement before a component fails. Store a few compatible connectors, clamps, and emitters in a dry place, but avoid stocking parts without checking their specifications. Label shutoff valves and take a clear photo of buried-line locations. When replacing a part, isolate the water, match its pressure rating and connection, then test for leaks before closing the valve box. I still miss a detail now and then, so I update the notes after each repair.

    How to Choose the Right Irrigation Parts? - Plan for Installation, Maintenance, and Future Replacement

    Part What to Check When Choosing Installation Planning Routine Maintenance Signs It May Need Replacement
    Supply pipe and fittings Match pipe material, diameter, pressure rating, and fitting type to the water source and system design. Check local requirements for potable-water connections. Map pipe routes, allow access to valves and joints, and protect exposed pipe from sunlight, impact, and freezing where relevant. Inspect accessible joints for leaks and check exposed sections for cracking, movement, or damage. Repeated leaks, brittle or cracked pipe, damaged threads, or fittings that no longer seal reliably.
    Filter Select a filter type and filtration level compatible with the water source and the smallest passages in the emitters. Follow the irrigation component specifications. Install where it can be reached for cleaning, typically upstream of sensitive downstream components; provide suitable isolation if needed. Clean the screen or element at the interval recommended for the water quality and system use. Check for pressure loss or clogging. A damaged screen, cracked housing, persistent blockage, or continued downstream clogging after cleaning.
    Pressure regulator Choose an outlet pressure that suits the selected emitters or sprinklers, and confirm the regulator's flow range and connection size. Place it in the correct flow direction and position relative to the filter and irrigation zones, following the component instructions. Check operating pressure with a gauge and look for changes that could indicate blockage, wear, or a system leak. Pressure remains outside the required range after other restrictions or supply issues have been checked.
    Control valve Match valve size and flow capacity to the zone. For electric valves, verify controller voltage and wiring compatibility. Use an accessible valve box or location, observe the flow-direction marking, and keep wiring connections protected from moisture. Operate each zone periodically; inspect for debris, leaks, and reliable opening and closing. The valve sticks, fails to open or close consistently, or leaks when shut despite cleaning and troubleshooting.
    Drip tubing and emitters Match emitter flow rate and spacing to plant needs, soil, and zone capacity. Check whether pressure-compensating emitters are needed for the layout. Lay tubing without sharp kinks; secure it as needed and keep emitters accessible for inspection and flushing. Flush lines where the system design allows, inspect emitters for clogging, and check that water reaches the intended plants. Cracked tubing, persistent leaks, or uneven output that remains after flushing and cleaning.
    Sprinkler heads and nozzles Choose a spray pattern and precipitation rate suited to the area. Confirm that the available flow and pressure support the selected heads. Position heads for the intended coverage and avoid obstruction by paths, walls, or mature plants. Set the spray direction after installation. Clean clogged nozzles, check for tilted or sunken heads, and adjust coverage to limit overspray. Broken bodies, damaged nozzles, persistent leakage, or poor coverage after cleaning and adjustment.
    Backflow prevention device Select a device appropriate to the water connection and hazard level; requirements and approved device types vary by local code. Plan for the required location, access, drainage, and any inspection or testing specified by local authorities. Arrange testing and servicing at the intervals required locally, and check for leaks or visible damage. Failed testing, corrosion, physical damage, or leakage; use a qualified professional where required.
    Controller and sensors Confirm the controller supports the number of zones and the required power supply. Check sensor compatibility before purchase. Locate the controller where it is protected and accessible; route wiring safely and label zone connections for future service. Review schedules seasonally, test each zone, and clean or inspect sensors according to their instructions. Unreliable zone operation, damaged wiring, or a sensor that gives persistently incorrect readings after checks.

    Planning note: Before purchasing parts, confirm the water source, available flow and pressure, zone layout, pipe and fitting compatibility, and applicable local codes. Keep a record of part specifications and installation locations to simplify maintenance and future replacement.