How to Use a Car Battery Jumper Safely
A flat battery can turn an ordinary morning into a quiet, frustrating problem: the dashboard stays dark, the starter clicks, and the car will not move. A Car Battery Jumper can help, but a rushed connection may damage vehicle electronics or cause sparks near the battery. The goal is not simply to get the engine running. It is to do so with the right equipment, a clear sequence, and attention to the vehicle manufacturer’s instructions. Small details matter.
The age of the vehicle fleet makes basic battery knowledge useful. S&P Global Mobility reported that U.S. light vehicles averaged 12.6 years old in 2024. That figure does not mean older cars will fail to start, but aging vehicles may need closer attention to battery condition, terminals, and charging systems. Not every no-start problem is a dead battery. A weak alternator or loose connection can look similar.
A safe guide should explain how to inspect a portable jumper, check its voltage compatibility, and connect the clamps according to its manual. It should also cover where to place the unit, what warning lights or damaged cables mean, and when to stop and call a qualified roadside professional. Keep metal jewelry away from terminals, and never guess at polarity. It is easy to feel confident after one successful jump. That confidence is not a substitute for checking the instructions each time.
Verify the 12-V System and Battery Type; a Charged Lead-Acid Battery Reads ≈12.6 V
Before connecting a car battery jumper, confirm the vehicle uses a 12-volt system and identify its battery chemistry. A conventional, fully charged lead-acid battery, rested with the engine off, reads about 12.6 volts; roughly 12.6–12.8 volts is common near room temperature. Battery Council International service guidance treats resting voltage as a charge indicator, while SAE J537 sets standardized procedures for testing storage batteries. A voltage reading is not a complete health test. Cold weather, recent charging, or a failing cell can mislead you.
Check the battery label and vehicle manual: flooded lead-acid and AGM batteries are both lead-acid, but some vehicles use other chemistries or system voltages. Don’t guess. If the label is unreadable, pause and seek qualified help. Park safely, switch off ignition and accessories, and inspect for cracks, leaks, swelling, or frozen casing. Never jump a damaged battery. With a compatible 12-volt setup, connect positive to positive; attach the final negative clamp only at the vehicle’s specified ground point, away from the battery. Keep clamps apart. I still double-check polarity, even when the cables look obvious. Remove them in the reverse order after starting, and follow the vehicle manual if its procedure differs.
Inspect the Case and Cables; Never Jump a Cracked, Leaking, or Frozen Battery
Before connecting a car battery jumper, inspect the battery in good light. Look along the case seams for cracks, bulges, or wet patches. A sharp, sour smell or visible liquid can signal damage. Do not touch leaking fluid, and do not try to jump that battery. Step away and arrange professional help. Stop there.
Check for ice or a swollen case, especially after the car has sat in freezing weather. A frozen battery can crack or rupture during charging, even if the damage is not obvious. Never jump it; let a qualified technician assess it. Also examine both cables from end to end. Reject cables with split insulation, exposed wire, loose clamps, or heavy corrosion. Damaged leads can heat up or spark. Keep metal tools away from the terminals.
A clean-looking case can still hide a problem, so this inspection is only a first check. If you cannot tell whether the battery is frozen, leaking, or structurally sound, do not guess. Avoid bending over it while connecting anything. Keep sparks and flames away, and follow the vehicle and jumper instructions only when the battery and cables appear intact. It can feel frustrating to stop for a small mark, but a damaged battery is not worth testing with a jump.
Connect Clamps in Order: Dead-Battery +, Donor +, Donor −, Engine Ground
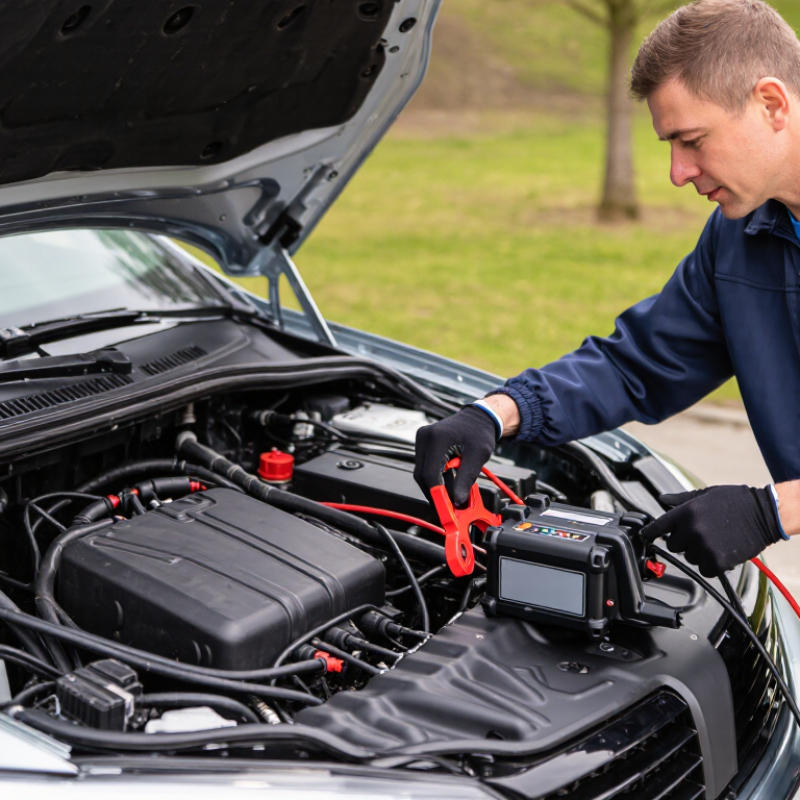
Before using jumper cables, switch off both vehicles and put them in Park or neutral with the parking brakes set. Check the owner’s manuals; some vehicles require specific jump-start points. Do not jump a cracked, leaking, or frozen battery. Keep sparks and flames away. A small mix-up is easy when cables are tangled, so pause and identify each clamp before connecting.
Follow this order: attach red to the dead battery’s positive (+) terminal, then red to the donor battery’s positive (+) terminal. Attach black to the donor battery’s negative (−) terminal. Connect the final black clamp to clean, unpainted metal on the disabled vehicle’s engine block or designated ground point, away from the battery and moving parts. Keep clamps from touching each other. Check every connection.
Tips: Keep cables clear of fans and belts. If a clamp slips, stop and reposition it safely. Start the donor vehicle, wait a few minutes, then try the disabled vehicle. If it does not start, avoid repeated long cranking; check the manual or call for assistance. Once running, remove clamps in reverse order, beginning with the engine ground. I still find that final connection worth double-checking. Don’t rush it.
Start the Donor, Then the Disabled Car; Crank for 5–10 Seconds at Most
Park the cars close enough for the cables to reach, but keep them from touching. Switch off both ignitions and accessories. Do not jump a battery that is cracked, leaking, swollen, or frozen. Check both vehicles’ manuals, since some models require designated jump-start posts. Connect the red clamp to the disabled car’s positive terminal, then the donor’s positive terminal. Attach the black clamp to the donor’s negative terminal, then to an unpainted metal ground point on the disabled car, away from its battery. Keep clamps apart.
Start the donor car and let it idle. Then try starting the disabled car. Crank for no more than 5–10 seconds at a time; long attempts can overheat the starter and cables. No luck? Stop. Wait a minute before trying again, and avoid repeated attempts if the engine only clicks or the cables become warm. Once the disabled car starts, let both engines run briefly, then remove the clamps in reverse order, keeping them clear of moving parts. I’ve seen people rush this step. A steady hand matters more than speed. If the car will not start after a few short tries, stop and seek qualified help.
Safe Jump-Start Cranking Time
The stated range is 5–10 seconds per cranking attempt; 10 seconds is the upper limit, not a target. Start the donor vehicle first, then try starting the disabled vehicle. Stop sooner if it starts, and follow both vehicles’ owner manuals.
Remove Clamps in Reverse Order; Recharge and Recheck Resting Voltage (≈12.6–12.8 V)
After the engine starts, let both vehicles settle before disconnecting anything. Keep the clamps apart; even a brief touch can cause sparks. Remove them in reverse order: black clamp from the disabled vehicle’s ground point, black clamp from the donor battery, red clamp from the donor battery, then red clamp from the revived battery. Keep each clamp clear of belts, fans, and painted bodywork. They can move unexpectedly.
A successful jump is not a full recharge. Use a compatible battery charger in a dry, ventilated area, following its instructions. I used to assume a longer drive would fix everything. That is not always true, especially with an old or deeply discharged battery. Let the battery charge fully, then switch off the vehicle and all accessories. Wait several hours before checking voltage; an immediate reading can be misleading.
Measure across the battery terminals with a reliable multimeter. A rested, fully charged 12-volt lead-acid battery commonly reads about 12.6–12.8 volts. Temperature and battery type can affect the result. If the reading stays low, drops quickly, or the engine struggles again, have the charging system and battery tested. I would not ignore repeated trouble. Safety matters more than another jump.
 English
 Français